

Related Articles
Introduction
Vite is a build tool that aims to provide a faster and leaner development experience for modern web projects.
It comes with two major feature:
- A dev server with rich features and extremely robust HMR(Hot module replacement)
- A build command that bundels your code in an optimized assets ready for production
In this article we will setup Vite to bundle and serve our django static files. The process is simple and straightforward to let’s begin.
Project structure
You can follow these steps in an old or new django project without any major changes.
For the purpose of this article we will be using a project with bellow structure.
MYSITE
 > .venv
 > blog
 > mysite
 > static
 > templates
   manage.py
   requirements.txt
Django static files settings
mysite/settings.py
STATIC_URL = "static/"
STATICFILES_DIRS = [BASE_DIR / "static"]
STATIC_ROOT = os.path.join(BASE_DIR, "staticfiles")
Setup npm
In this artilce, I will setup npm in the root of the project. In the terminal run the bellow command.
npm init
This will create a package.json file in the root of your application with the bellow content by default.
package.json
{
  "name": "mysite",
  "version": "1.0.0",
  "description": "",
  "main": "index.js",
  "scripts": {
    "test": "echo \"Error: no test specified\" && exit 1"
  },
  "author": "",
  "license": "ISC"
}
This has setup npm in our project so now lets install Vite and Tailwind Css to our project.
Install Vite and Tailwindcss
npm install -D vite tailwindcss postcss autoprefixer django-vite-plugin
Initialize tailwind css with the bellow command. It will create tailwind.config.js and postcss.config.js files in the root of your application.
npx tailwindcss init -p
Edit the tailwind.config.js to tell tailwind which files it should watch for changes.
/** @type {import('tailwindcss').Config} */
module.exports = {
  content: ["./templates/**/*.{html,js}", "./**/templates/**/*.{html,js}"],
  theme: {
    extend: {},
  },
  plugins: [],
}
"./templates/**/*.{html,js}"
Watch all html and js file inside the templates folder in the root of our project.
MYSITE
 > ...
 > templates
   manage.py
   requirements.txt
"./**/templates/**/*.{html,js}"
Watch all html and js files inside each app templates folder.
MYSITE
> ...
 > blog
   - templates
      - blog
 > ...
   manage.py
   requirements.txt
Tailwind will watch those files for changes and add/reload necessary css classes.
Setup Vite
Create main.js and tailwind.css files
In the static folder at the root of your project create the bellow files
static/js/main.js
console.log('Js is working')
static/css/tailwind.css
@tailwind base;
@tailwind components;
@tailwind utilities;
Create **vite.config.js** file with the create js and css files as input.
//vite.config.js
import { defineConfig } from "vite";
import djangoVite from "django-vite-plugin";

export default defineConfig({
  plugins: [
    djangoVite({
      input: ["./static/js/main.js", "./static/styles/tailwind.css"],
    }),
  ],
});
add vite scripts to package.json
// ...

"scripts": {
    "test": "echo \"Error: no test specified\" && exit 1",
    "dev": "vite",
    "build": "vite build",
    "preview": "vite preview"
  },

// ...
Install django_vite_plugin
We will be using this plugin to configure Vite with our django backend project.
pip install django_vite_plugin
add the plugin to installed_apps
mysite/settings.py
# mysite/settings.py

INSTALLED_APPS = [
	# ...,

'django_vite_plugin',

]
add the plugin settings and setup templates in django
# mysite/settings.py

DJANGO_VITE_PLUGIN = {
    "BUILD_DIR": "staticfiles/build",
    "BUILD_URL_PREFIX": "/" + STATIC_URL + "build",
    "DEV_MODE": True,
}
"BUILD_URL_PREFIX": "/" + STATIC_URL + "build"
The prefix the will be added to our built assets URLs
"DEV_MODE": True
If true, the routes for the assets will use http:127.0.0.1:5173 and If false the plugin will use the compiled version of our assets.
-
True
http://127.0.0.1:5173/static/js/main.js](http://127.0.0.1:5173/static/js/main.js)
-
False
http://127.0.0.1:8000/static/build/assets/main-9c837c14.js](http://127.0.0.1:5173/static/js/main.js)
Load Vite in templates
create a template file
templates/blog//main.html
<!DOCTYPE html>
{% load vite %}
<html lang="en">
<head>
<meta charset="UTF-8" />
<meta http-equiv="X-UA-Compatible" content="IE=edge" />
<meta name="viewport" content="width=device-width, initial-scale=1.0" />
<title>My Django Site</title>
{% vite 'css/tailwind.css' %}
</head>
<body>
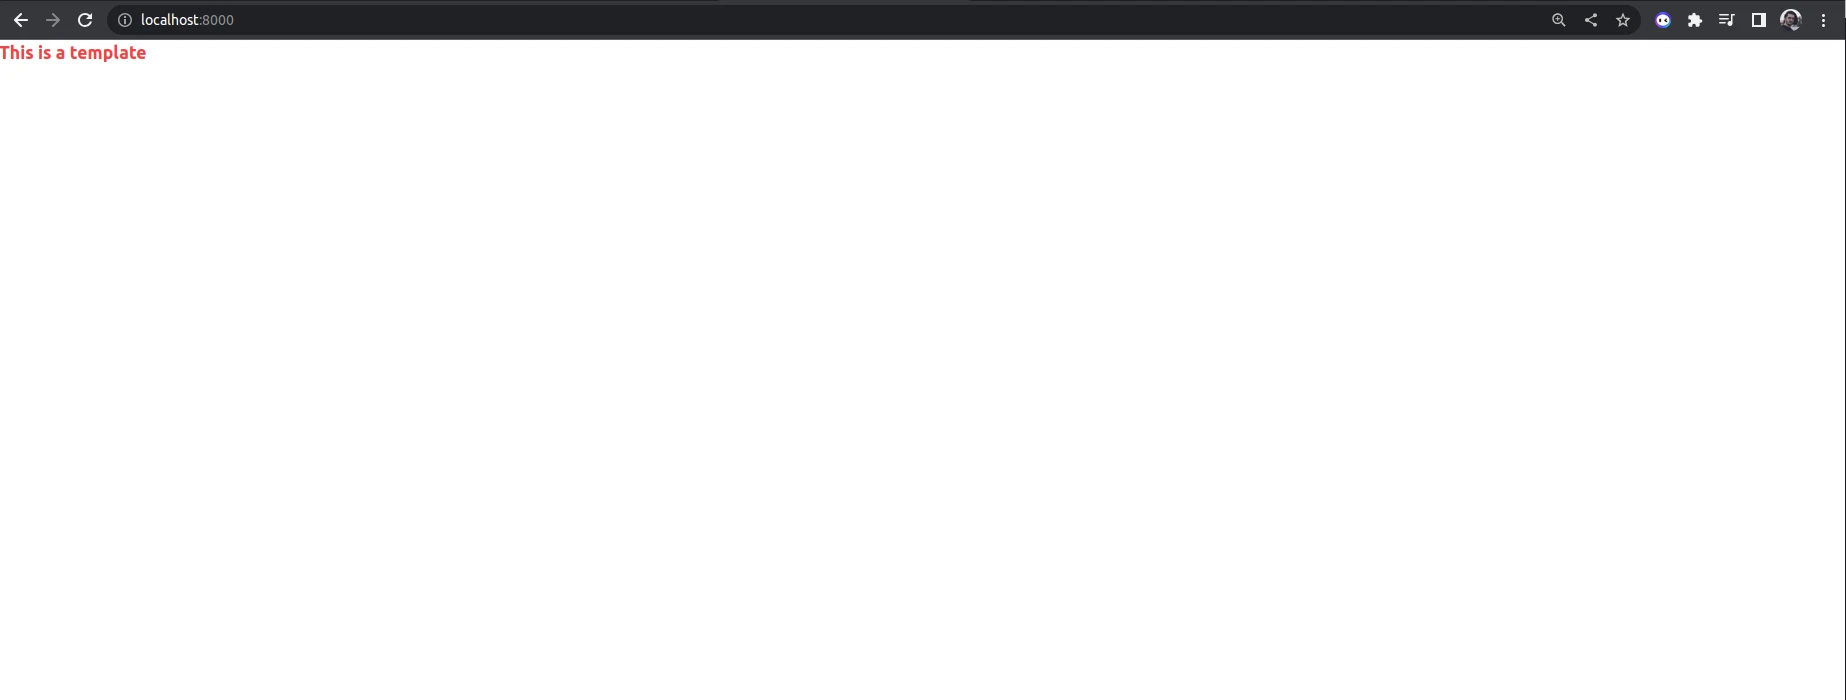
<h2 class="text-red-500 font-bold">This is a template</h2>
{% vite 'js/main.js' %}
</body>
</html>
I have assumed that you know how to setup urls and views in django
output
Tailwind is successfully setup so lets create a full page
Full tailwind page
Let’s get a full tailwind page from tailwind components for out home page
https://tailwindui.com/components/application-ui/application-shells/stacked
templates/blog/main.html
The output will be
Setup for production environment
Build the assets for production. The compiled assets will be on the folder the we specified in the plugin settings.
DJANGO_VITE_PLUGIN = {
    # ....
    "DEV_MODE": False,
		# ....
}
"BUILD_DIR": "staticfiles/build"
to build the assets run the bellow command in your production environment.
npm run build
If you are using a managed hosting provider you need to change or customize the default build process for your project.
As an example railway uses nixpacks for building your project and detects the framework automatically for you.
The problem with our current setup is that we have bothpackage.json and requirement.txt file by default nix will pickup node js and will try to build it using node settings which will fail.
So to customize this create nixpacks.toml
providers = ["python","..."]

[phases.build]
cmds = ["echo SHTB_first", "...", "echo SHTB_last"]
In the above TOML file, we told nixpack to first use python settings then your auto detected languages/frameworks.
Or if your package.json if inside another folder such as static use the cmds to build the assets after the python settings are done.
Conclusion
We successfully setup Vite and insalled tailwindcss on a django project