Let’s begin
Hey there, fellow programmers and code enthusiasts!
VS code is the best lightweight code editor and is very popular among developers despite it being a lightweight setup, most of us do not need to see all the available features and panels,so in this blog post I will try to minimize the distractions and remove the unused panels/windows from VS code. this is possible thanks to VS code customizability and usage of shortcuts. Yes we dont want the distraction of clattered but we will still be able to use them or hide/unhide them using shortcuts.
So dont be afraid and make your setup as minimal as possible so that you can focus on what is important: writing code and solving problems.
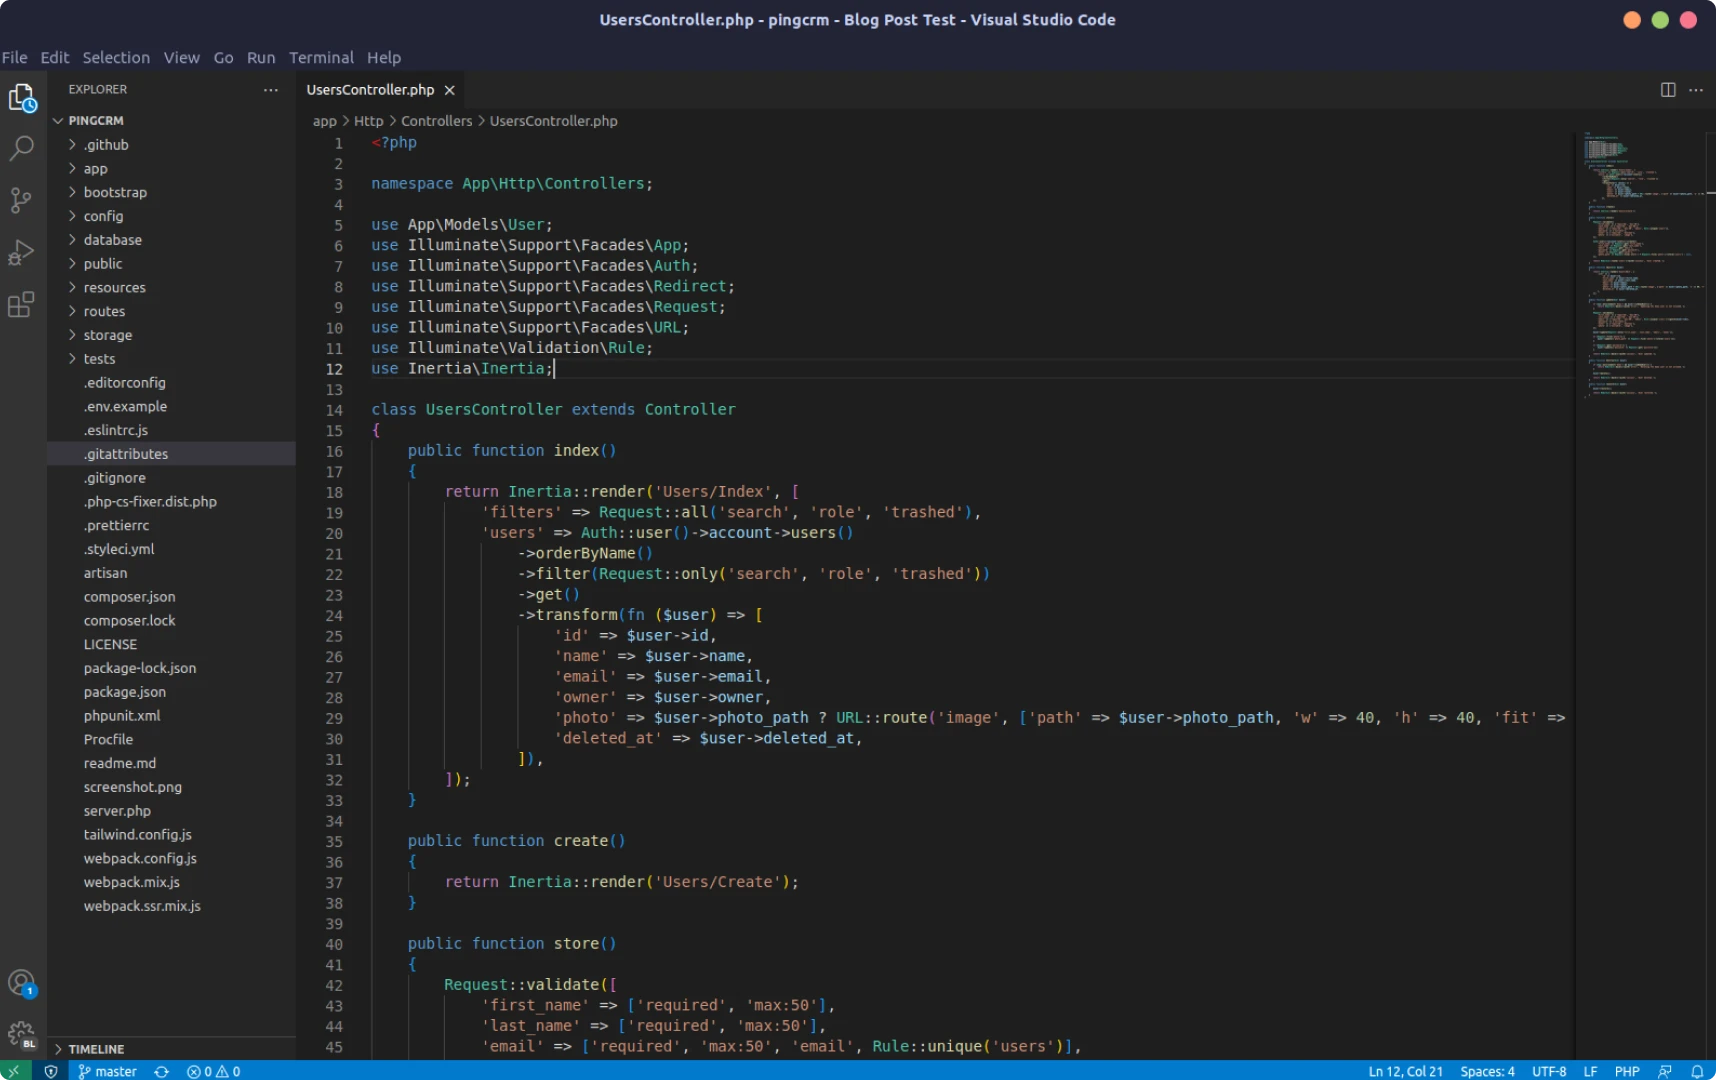
The default VS code setup will look something like the bellow screenshot.
grab your favorite beverage, sit back, and let’s dive into the world of VS Code customization!
Color / Theme
The quickest and easiest way to customize VS code appearance is by installing a theme from the extension store.
So let’s install one
Install Color Theme
I am going with Monokai Pro but it is personal choice you can download any theme that you like.
head to Extensions Ctrl + Shift + x and search for your favorite theme. In my case I am going for Monokai Pro and click the install button.

Change the theme
After the installation is complete go to FIile → Preferences → Color Theme and click on it.
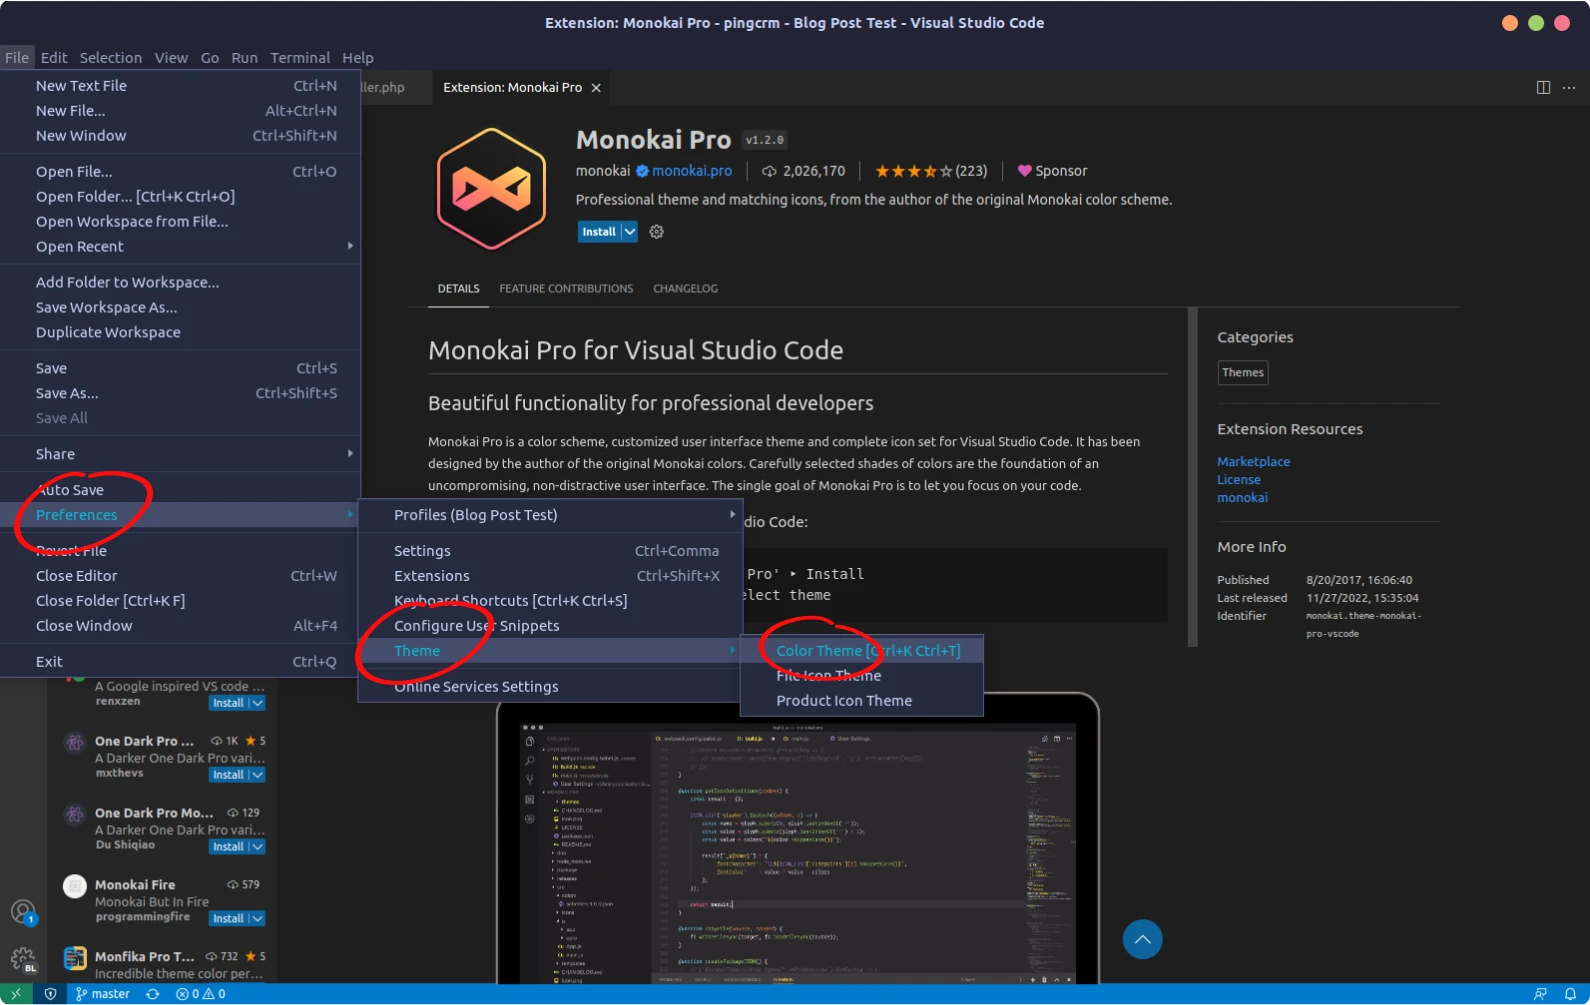
You see a dropdown with all of your installed themes.
Scroll down and choose Monokai Pro.
You will get a preview of how the theme will look like when you scroll down the dropdown.

After applying the theme your editor will look a lot better than the default look.
Install Icon Theme
The Monokai Pro come with its own icon theme but the color theme that you choose might not include an icon theme by default so in that case you need to install an Icons Theme yourself.
luckily it is as easy as installing the Color Theme.
Search for your Icon Theme and install it. The same activation process can be applied to Icon themes as well
lets make some more changes
Install Product Icon Theme
product icons theme will change the VS code system icons like explorer, git and etc.
Install Font
When it comes to customizing your VS Code appearance, choosing the right coding font can make a huge difference in readability and overall aesthetics. The wrong font can strain your eyes and distract you from your code, while the right font can enhance your experience and make your code pop.
Some popular and free coding fonts are Cascadia Code and JetBrains Mono . I will use Cascadia Code for this tutorial.
Installing the fonts differs depending on your Operating system but it is easy just search for it in google you can install a new font in a few steps.
Change the font in the Vscode settings
We have installed the font in our system so now lets tell VS code to use that font.
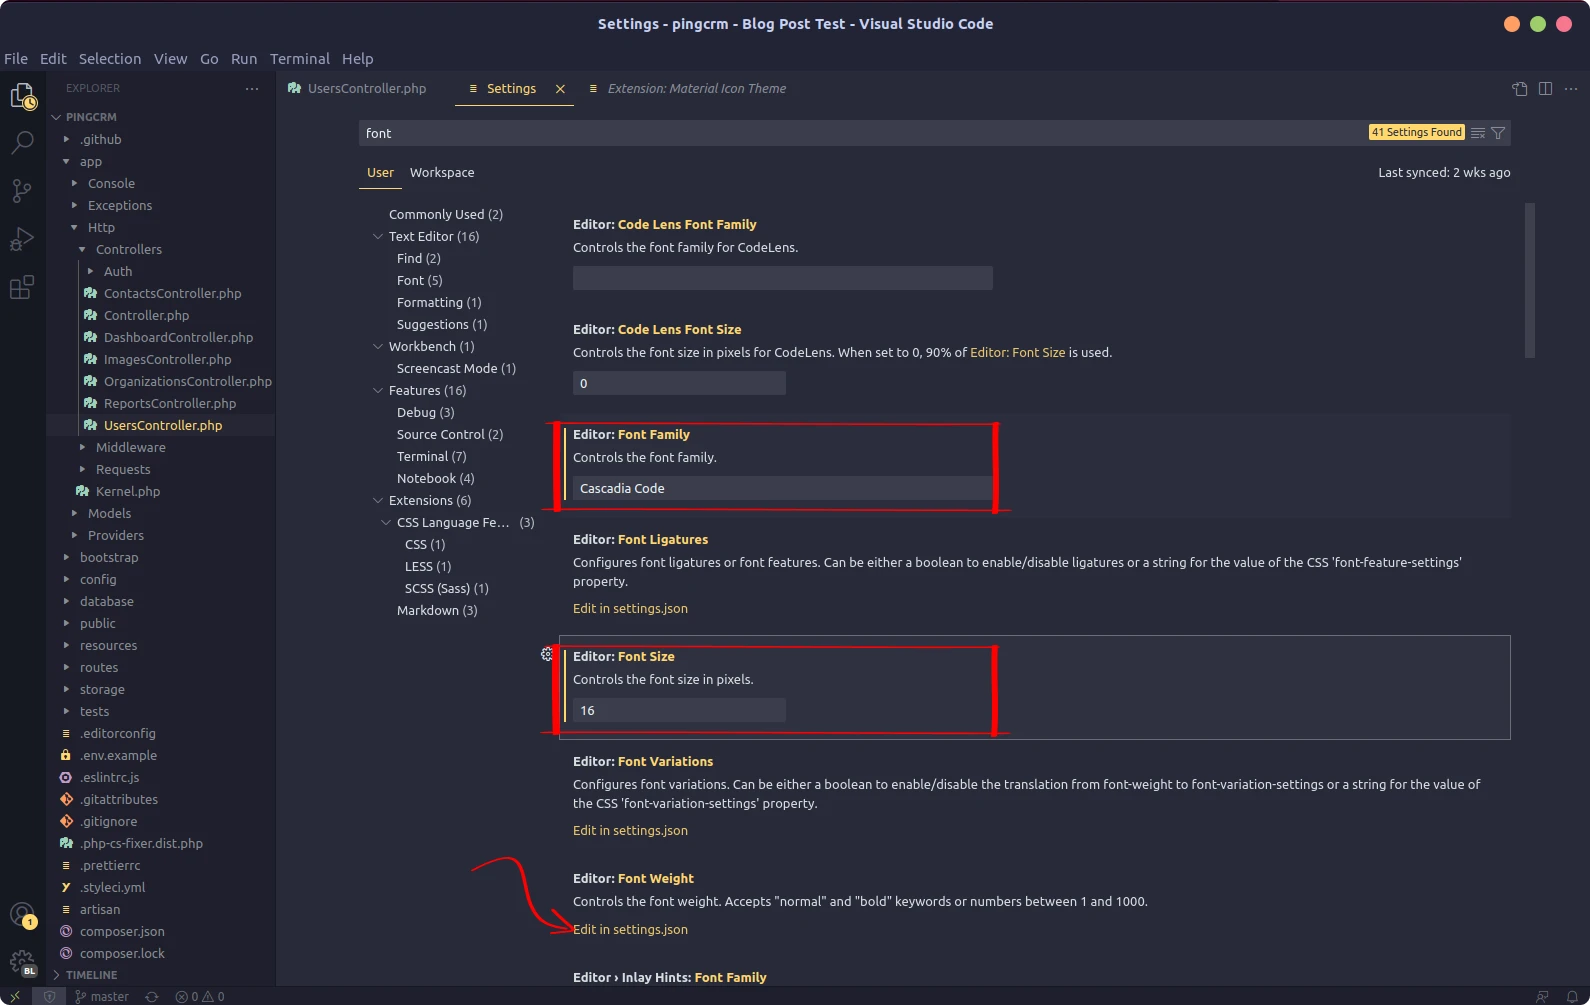
Go to Settings of you VS code by pressing(Control and Comma) ctrl + , and in the top search bar type font and make the bellow changes.
- Change the
Editor: Font FamilytoCascadia Code - Change the
Editor: Font Sizeto16
-
Click on the Edit in
settings.jsonin theEditor: Font Weightsection.set the
fontWeightto600
{
    "editor.fontFamily": "Cascadia Code",
    "editor.fontSize": 16,
    "editor.fontWeight": "600"
}
- Change the Editor: Line Height to 1.8

let’s cleanup some of the windows/panels
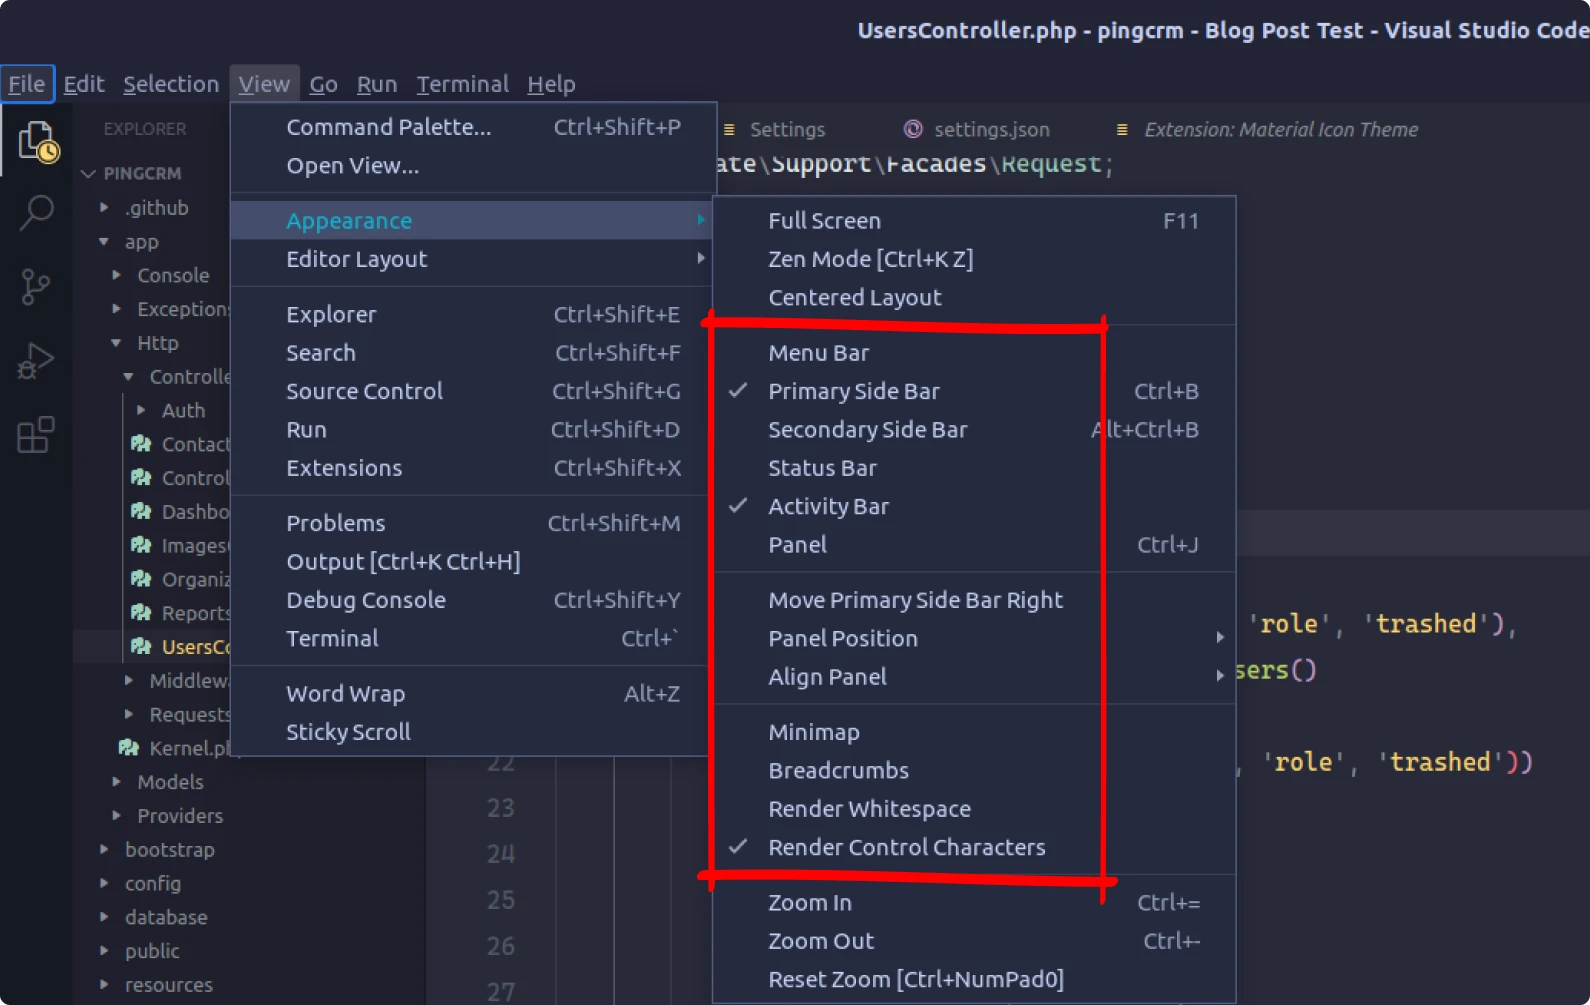
Go to the View -> Appearance and deactivate all these windows and panels
- Menu Bar
- Status Bar
- Secondary Sidebar
- Minimap
- Breadcrumbs
- Render whitespace
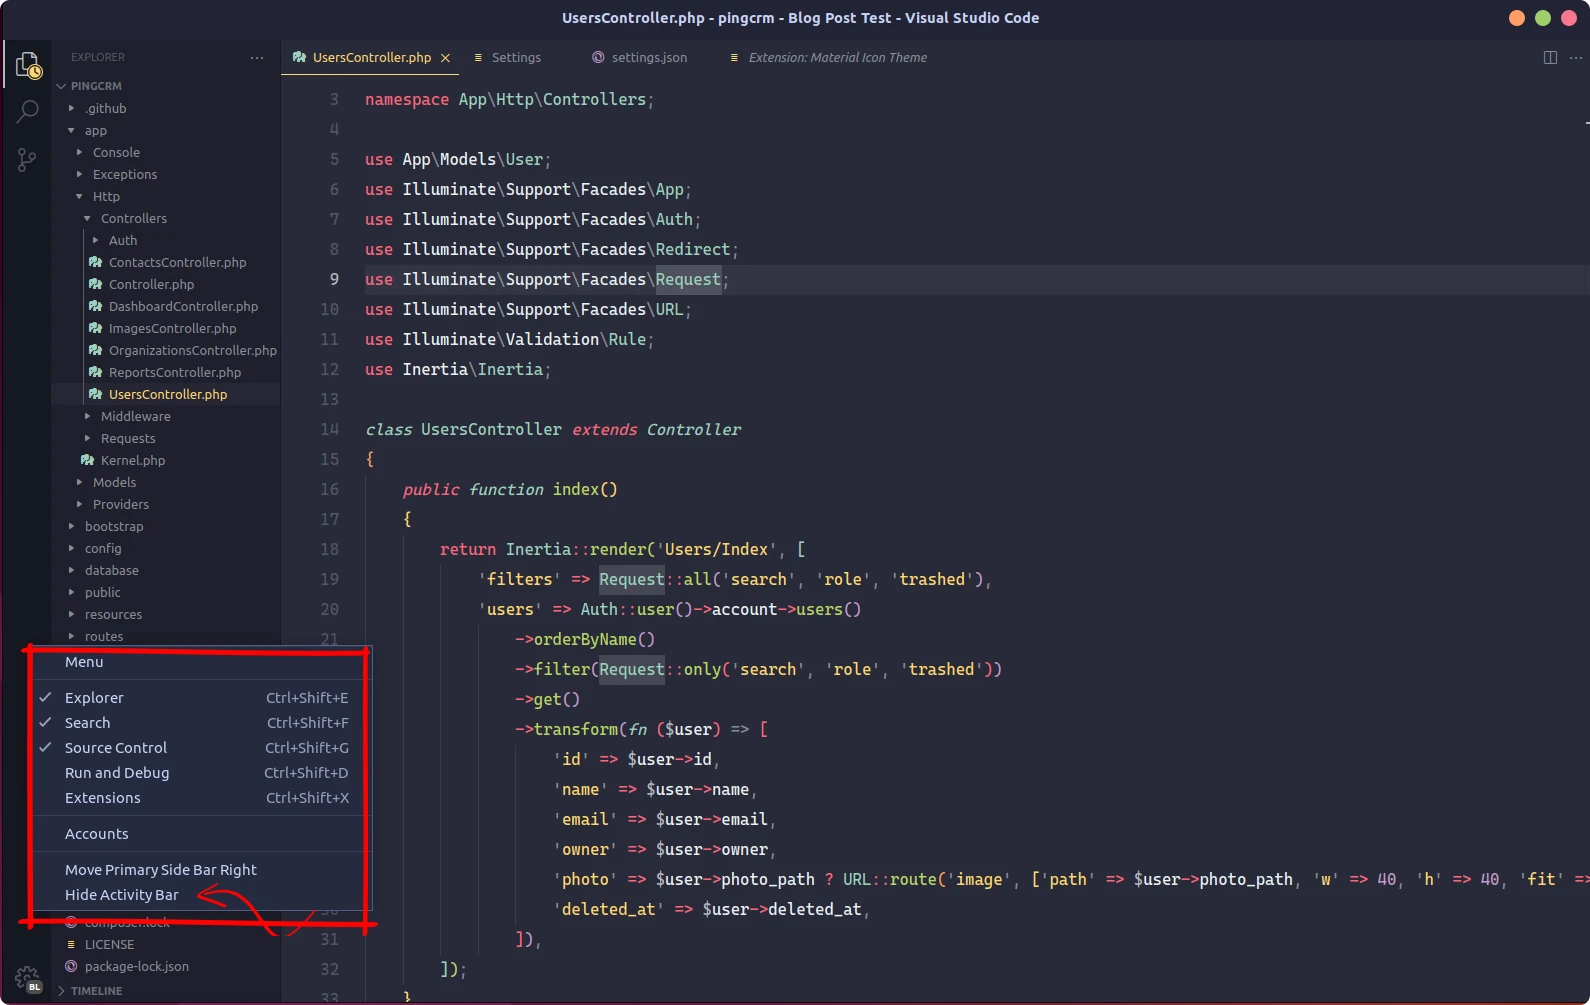
Cleanup the activity bar
Activity bar is the left most vertical side bar in VS code window.
Disable the unused features. You can always use the shortcut to jump to those panels later
- Run and debug
- Extensions
- Accounts
- Check hide the activity bar
After our changes, our setup will look like this to switch between File View you can use ctrl + b
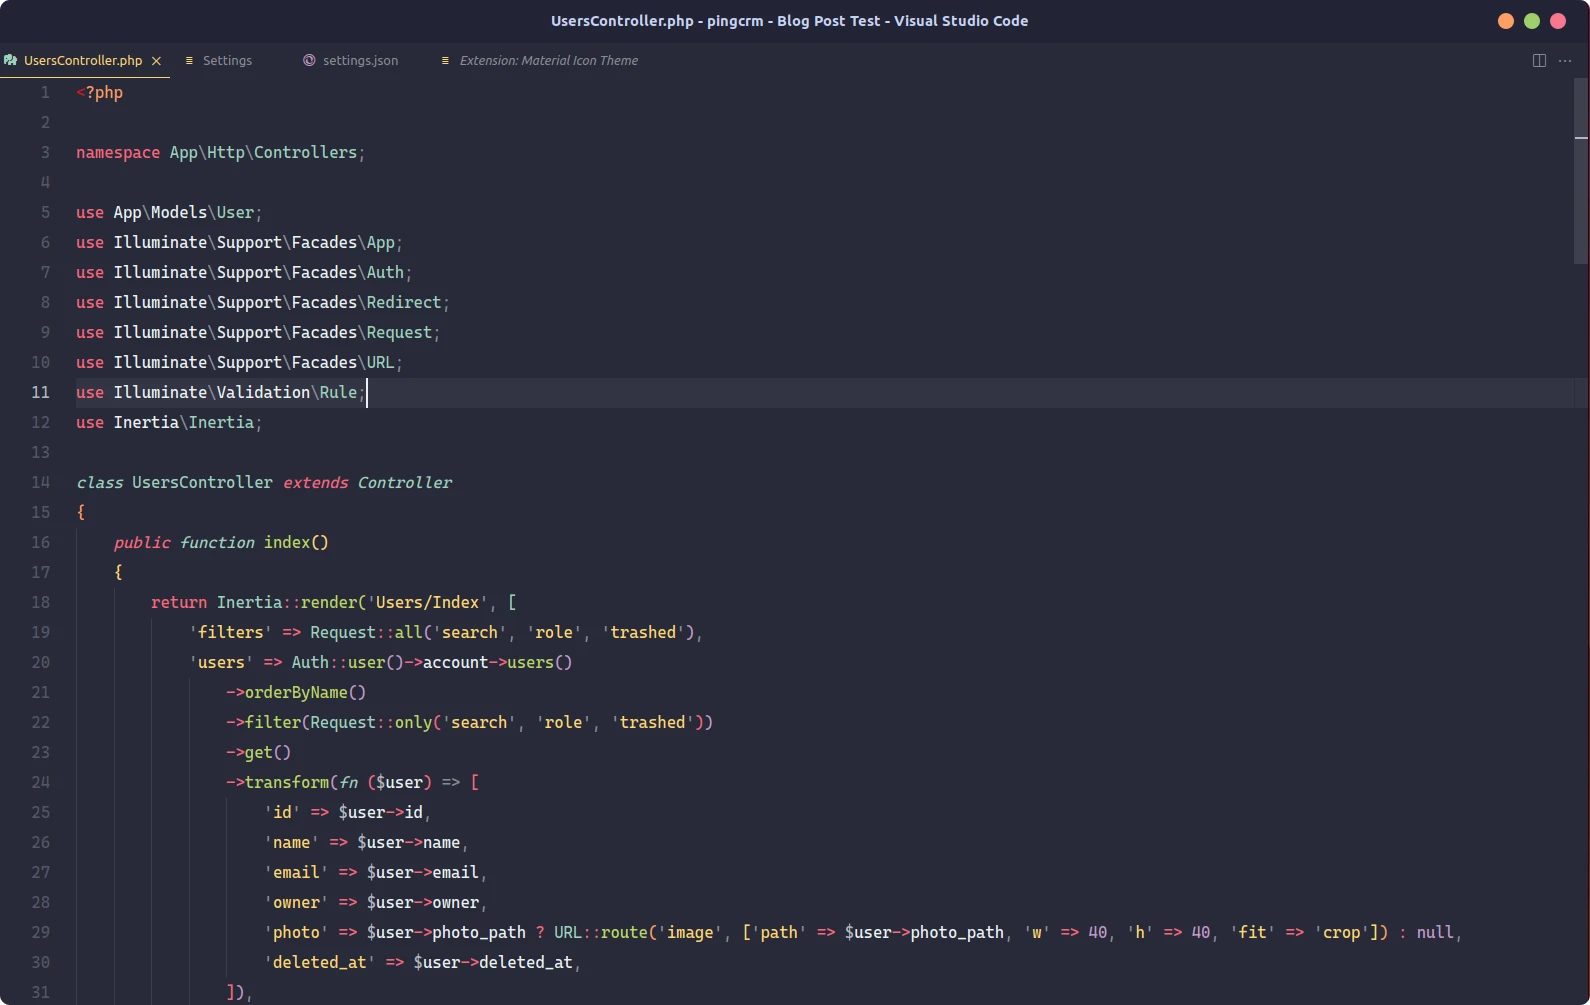
And that’s a wrap, folks! I hope you enjoyed guide to customizing VS Code for a minimalist look. By now, you should have the tools and know-how to create a workspace that maximizes your productivity and creativity, Happy coding!

